Water damage can turn a calm home into an urgent repair site. You need to stop the source first, then shut off power if the area is wet and use protective gear before you step in. Take photos, remove standing water, and start drying with fans and dehumidifiers, but don’t assume the job is done yet. Hidden moisture can still fuel mold, and the next steps matter more than you might expect.
Key Takeaways
- Stop the water source immediately and shut off electricity if water reached outlets or wiring.
- Make the area safe by wearing protective gear and checking for structural hazards before entering.
- Document all damage with photos, videos, dates, and notes for insurance claims.
- Remove standing water quickly, then dry the home thoroughly with fans and dehumidifiers.
- Contact your insurer and a restoration professional promptly to inspect hidden moisture and prevent mold.
Stop the Water After Water Damage
If you can do so safely, stop the water source right away. Shut off the main valve, close the supply line, or turn off the fixture feeding the leak.
If the source is a burst appliance, disconnect it only after you’ve stopped incoming water. This is the first step in what to do after water damage because every minute adds moisture and cost.
If the leak comes from a ceiling, roof, or hidden pipe, contact a plumber or utility provider at once and keep tracking where the water’s coming from. You’re not alone here; many homeowners face the same problem, and quick action helps you regain control.
Once the flow stops, document the source with photos and notes so you can move into cleanup and restoration with confidence.
Make the Area Safe
Before you enter the damaged area, make sure it’s safe to do so. Shut off electricity at the breaker if water reached outlets, cords, or appliances. If you smell gas, leave and call your utility provider.
Wear boots, gloves, and a mask to reduce exposure to contaminated water, sharp debris, and mold spores. Keep kids and pets out until the space’s stable.
Check floors for sagging, soft spots, or loose tiles before stepping in.
Remove standing water only if you can do it without risk.
Ventilate the space by opening windows and using fans, if power is available.
Move slowly, test each step, and trust your instincts. You’re protecting your home and your people by making safety the first priority.
Document the Damage for Insurance
Document the damage as soon as it’s safe so you have a clear record for your insurance claim. Use your phone to photograph every affected room, including floors, walls, baseboards, furniture, appliances, and visible stains.
Take wide shots first, then close-ups that show texture, discoloration, and labels. Record short videos while you narrate what you see, and note the date, time, and source of the water if you know it.
Keep damaged items untouched so you preserve evidence. Create a simple log of losses, emergency costs, and conversations with your insurer. Save receipts for temporary supplies and professional inspections.
Organize everything in one folder, digital or paper, so you can share it quickly. Careful documentation helps you and your claim move forward with confidence.
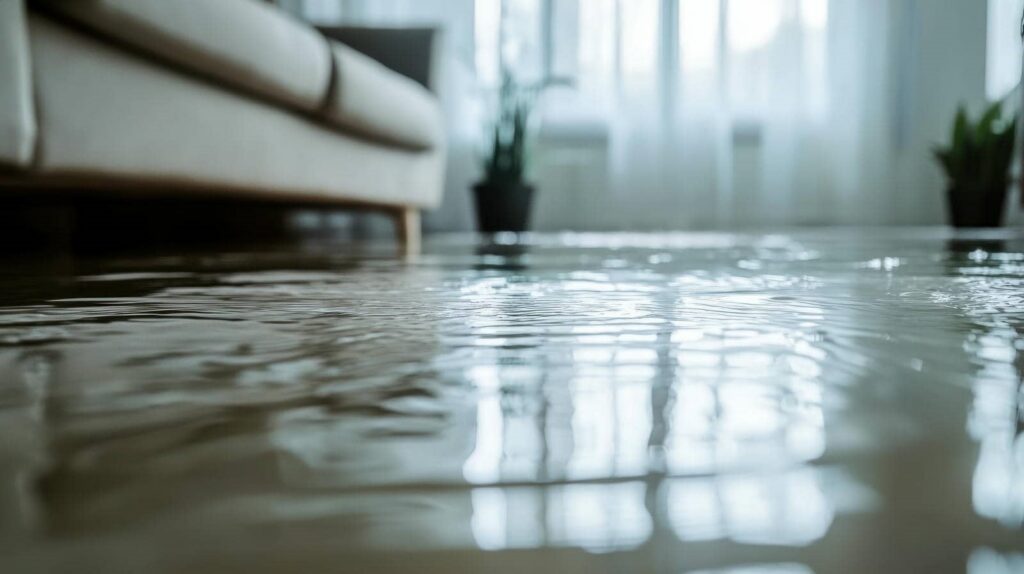
Remove Standing Water Fast
Once you’ve recorded the damage, get standing water out as quickly as you can to limit further soaking and reduce the chance of mold, swelling, and structural damage.
Use a wet/dry vacuum, sump pump, or buckets for shallow water, and start in the lowest areas first. Work room by room so you don’t miss hidden pockets under furniture or along baseboards.
- Shut off power to affected spaces if it’s safe.
- Remove light, movable items before they absorb more water.
- Empty water from carpets, floors, and containers fast.
Stay organized and keep the flow moving; that helps you and your household stay in control during a stressful moment.
If water keeps returning, call a professional right away. You’re not dealing with this alone.
Dry Out Your Home Completely
Once you’ve removed standing water, you need to dry every affected area completely to stop hidden moisture from causing further damage.
Increase air circulation with fans and open vents if conditions allow, and place dehumidifiers as soon as possible to pull water from the air and building materials.
Check damp spots regularly so you can keep drying until everything feels fully dry and stable.
Remove Standing Water
Start by removing all standing water as quickly and safely as you can, because trapped moisture can spread damage and slow recovery. You can use a wet/dry vacuum, mops, or buckets for small areas, or call a water removal service for larger flooding.
Work methodically so you don’t miss hidden pools near baseboards, under furniture, or in closets.
- Shut off power to affected rooms if water is near outlets.
- Extract water from floors, carpets, and hard surfaces.
- Check for absorbed water in rugs and padding.
You’re not handling this alone; steady, careful action helps protect your home and reduce repair costs.
After the visible water is gone, keep inspecting damp spots so you can move confidently to the next recovery step.
Increase Air Circulation
Open windows, run fans, and use dehumidifiers to speed evaporation and keep moisture from settling into walls, floors, and furnishings. Aim airflow across damp surfaces, not just into the room, so wet drywall, baseboards, and carpet backing dry faster.
Keep interior doors open when you can, and move lightweight furniture away from affected areas to create clear paths for air. If you have ceiling fans, set them to move air downward only when surfaces are stable.
Check hidden spots behind couches, under rugs, and inside closets, because trapped humidity can linger there. You’re doing the right thing by drying thoroughly now; steady circulation helps limit warping, odors, and mold growth.
If materials stay damp, keep the airflow going until they feel fully dry to the touch.
Use Dehumidifiers Promptly
Place dehumidifiers in the dampest rooms as soon as possible to pull excess moisture out of the air and speed up drying. You’ll protect walls, flooring, and belongings by lowering humidity before mold can take hold.
Set each unit near the center of the room, close doors and windows, and empty the reservoir often so it keeps working efficiently. If you’ve got a large affected area, use multiple units to cover the whole space.
- Run dehumidifiers nonstop until the humidity drops below 60%.
- Pair them with fans for steady airflow.
- Check hidden spaces, like closets and baseboards, for lingering dampness.
You’re not alone in this; quick, consistent drying helps your home recover safely and completely, restoring a healthy space for everyone.
Check for Mold and Hidden Moisture
Even after visible water is gone, you still need to check for mold and hidden moisture, because damp materials can keep spreading damage behind walls, under floors, and inside insulation.
You can use a moisture meter to spot wet drywall, baseboards, and framing that feel dry on the surface but aren’t. Look for musty odors, discoloration, peeling paint, and soft spots, since these often signal hidden growth.
If you see fuzzy patches or widespread staining, don’t disturb it; keep the area closed off and limit airflow that can spread spores. Remove wet items you can clean and dry quickly, and keep monitoring the space for a few days.
You’re not alone in this—careful inspection now helps protect your home and your health.
Contact Your Insurer and a Restoration Pro
Notify your insurer right away and start documenting every affected area with photos, videos, and notes.
This record helps support your claim and shows the full extent of the damage.
Then call a restoration pro so they can assess moisture, prevent further loss, and begin proper drying and repairs.
Notify Your Insurer
Reach out to your insurer as soon as you can so they can open a claim and guide the next steps, and contact a restoration pro to assess the damage and start mitigation.
You’re not handling this alone; your claim team and crew can help you move forward with confidence. Give the insurer your policy number, the date of loss, and a brief explanation of what happened.
Ask what your coverage may include and whether they need emergency service approval. Then keep communication organized:
- Record the claim number.
- Note the adjuster’s name and contact details.
- Confirm any required next actions.
Stay calm, clear, and consistent. Quick reporting can help reduce delays, limit extra loss, and get your home back to normal sooner.
Document All Damage
As soon as it’s safe, document every area affected by the water with clear photos and short notes, then share that record with your insurer and restoration pro.
Capture wide shots and close-ups of walls, floors, ceilings, baseboards, cabinets, and belongings. Note the date, time, source if known, visible staining, sagging, and any odors.
Keep copies of receipts, repair estimates, and cleanup supplies so your claim file stays organized. Use one folder, digital or paper, and label everything clearly so you can find it fast.
This record helps your insurer verify loss and lets the restoration pro assess scope without guesswork. You’re not handling this alone; good documentation gives your team a solid starting point and helps move recovery forward with confidence.
Call Restoration Experts
Once you’ve documented the loss, call your insurer and a qualified restoration pro right away so they can guide the next steps and limit further damage.
Your insurer can open a claim, confirm coverage, and explain what records they’ll need. A restoration team can inspect hidden moisture, test materials, and set up drying before mold starts.
Stay involved so you know what’s happening in your home.
- Share photos, receipts, and the damage timeline.
- Ask for emergency mitigation, moisture mapping, and daily updates.
- Confirm the work plan, equipment, and estimated drying time.
This quick response protects your space and helps you feel supported by people who know the process.
Frequently Asked Questions
Should I Keep Damaged Belongings for Insurance Claims?
Yes, you should keep damaged belongings until your insurer inspects them. You’ll strengthen your claim with photos, lists, and receipts. Don’t discard anything unless it’s unsafe, and document each item’s condition carefully.
How Long Can Furniture Stay Wet Before It’s Ruined?
You’ve got hours, not days—soft furniture can sour like milk within 24–48 hours. Remove cushions, lift legs, and dry fast with fans and dehumidifiers. If it smells musty, you’ll need replacement or professional cleaning.
Can I Use a Regular Fan to Speed Drying?
Yes, you can use a regular fan to help dry wet areas, but you shouldn’t rely on it alone. You’ll need ventilation, dehumidifiers, and moisture checks too, so you don’t trap hidden dampness.
When Is It Safe to Turn Electricity Back On?
You can turn electricity back on only after a licensed electrician confirms outlets, wiring, panels, and appliances are dry, undamaged, and safe. If water reached them, stay off until inspection clears your home.
How Do I Know if Drywall Needs Replacement?
You’ll need replacement if drywall is swollen, crumbling, sagging, stained, or moldy. If it stays soft after drying, cut it out. You can trust a licensed pro to inspect hidden damage too.
Review
After water damage, you can protect your home by acting fast and staying safe. Shut off the source, cut electricity if needed, and document everything for your insurer. Remove standing water, then dry the space thoroughly with fans and dehumidifiers. Check for hidden moisture and mold so problems don’t snowball. When you contact your insurer and a restoration pro, you’ll keep the ball rolling toward a safe, fully restored home.