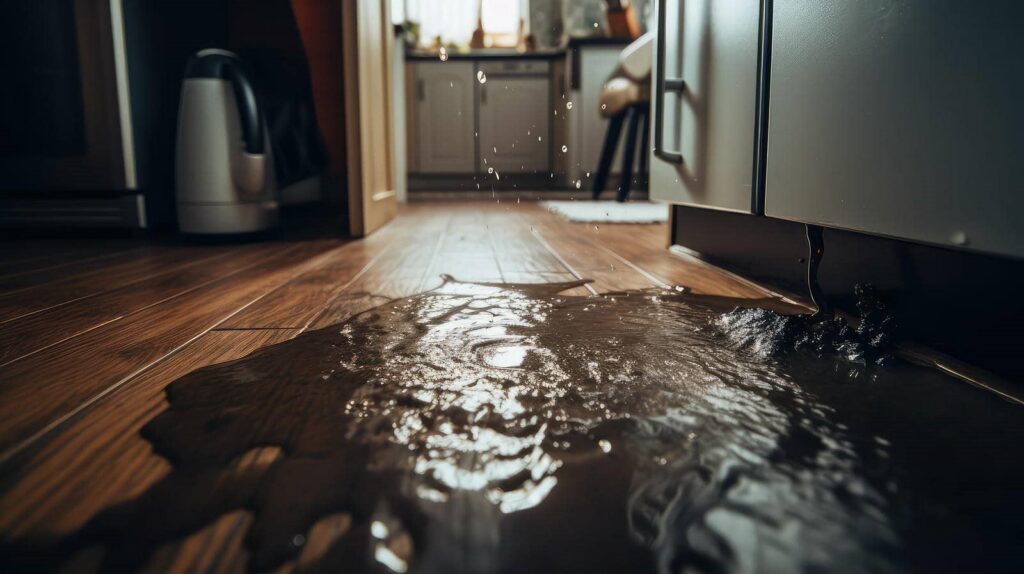
A burst pipe can turn a quiet room into a fast-moving hazard, and your first moves decide how much damage you’ll face. You need to shut off the main water supply, cut power to the affected area, and remove standing water as quickly as possible. From there, drying, cleaning, and material inspection become critical, but the real question is what you should salvage and when to bring in a pro.
Key Takeaways
- Shut off the main water supply, cut power if needed, and document the leak and affected areas.
- Remove standing water quickly with pumps or wet/dry vacuums, starting at the lowest point.
- Dry walls, floors, and ceilings with air movers and dehumidifiers, then check for hidden moisture.
- Clean and disinfect salvageable surfaces, and replace drywall, flooring, or insulation that cannot dry safely.
- Call a water damage professional for large or hidden damage, and prevent future bursts with insulation and pressure checks.
Stop the Leak and Cut Power
First, shut off the main water supply to stop the burst pipe from releasing more water. Then cut power to the affected area at the breaker if standing water is present or water has reached outlets, appliances, or wiring. You’ll protect yourself and keep the damage from spreading.
Next, identify the exact break, and confirm no secondary leaks continue behind walls or under fixtures. If the pipe is exposed, dry the area enough to inspect fittings and joints safely. Document the location, severity, and affected materials so your burst pipe water damage cleanup stays organized.
Then isolate nearby plumbing if possible and secure the site to prevent accidental re-pressurization. You’re not handling this alone; a clear, methodical response helps your home recover faster and keeps your cleanup team aligned.
Remove Standing Water Fast
Move quickly to extract standing water before it wicks into drywall, trim, subflooring, and insulation. Use a wet/dry vacuum for shallow water and a submersible pump for deeper pooling.
Start at the lowest point and work toward exits so you don’t spread contamination. Empty the recovery tank often, and keep hoses free of kinks.
If you’re managing a large loss, split the area into zones and assign one person to vacuum while another monitors water depth and power safety.
Pull water from corners, under cabinets, and along baseboards where it hides. Place removed water in a drain or outside discharge point approved for your site.
When you act fast and stay methodical, you protect the structure and help your team regain control together.
Dry Walls, Floors, and Ceilings
You should open wall cavities, remove trapped moisture, and run targeted airflow until the framing and insulation reach acceptable dryness.
You’ll then dry or replace soaked floor materials based on moisture readings and substrate condition.
Finally, you should dehumidify ceiling spaces to lower vapor levels and prevent hidden mold growth.
Dry Wall Cavities
Drywall cavities can trap burst pipe water long after the surface looks dry, so restoration crews open affected wall, floor, or ceiling assemblies to locate hidden moisture and stop it from spreading.
You’ll see technicians remove baseboards, trim, or limited drywall sections, then inspect insulation, framing, and fasteners for saturation, staining, and microbial growth.
They use moisture meters, thermal imaging, and small inspection openings to map wet areas and verify how far the water traveled.
Once they identify the cavity, they extract standing water, remove compromised insulation if needed, and set targeted air movers and dehumidifiers to drive evaporation.
You stay informed through documented readings, because accurate drying protects your space, supports faster repairs, and helps your home feel safe again.
Restore Floor Materials
Once crews finish moisture mapping, they restore floor materials by removing warped hardwood, swollen subfloor, delaminated underlayment, and saturated carpeting or padding before fungal growth can take hold.
You’ll then inspect joists and fasteners for rust, swelling, or loss of structural bearing, and document what you can save. Cut back damaged sections to clean edges, label reusable pieces, and bag debris to keep the work area safe for your team.
Install new underlayment to manufacturer specs, stagger seams, and fasten flooring with the correct adhesive or nails. If tile or vinyl was lifted, reset it only after the substrate reaches dry standards.
You’re rebuilding a stable, clean surface that helps your space feel whole again.
Dehumidify Ceiling Spaces
With ceiling cavities exposed and floor materials addressed, position dehumidifiers to pull moisture out of wall cavities, joist bays, and overhead spaces before condensation and microbial growth can return.
You should seal the work area, close HVAC registers, and route air movers so they push damp air toward the dehumidifier intake. Keep doors open between affected rooms so you’re drying the whole system, not just one spot.
Monitor relative humidity, aiming for 30% to 60%, and check hidden framing with a moisture meter each shift.
Empty reservoirs or run drain lines continuously, and clean filters so airflow stays strong.
If insulation stays saturated, remove it now. You’re protecting the structure and helping your crew restore a safe, dry space together.
Decide What to Salvage
Next, you need to assess each item for salvageability by checking material type, contamination, and structural integrity.
Compare the damage level against cleaning and drying costs, and remove anything that’s warped, mold-prone, or unsafe to restore.
Prioritize sentimental items last so you can document them carefully before deciding whether professional restoration is worth it.
Salvageable Item Assessment
You should assess each affected item quickly to decide what’s salvageable before moisture spreads further and worsens damage.
Start by separating dry, damp, and saturated belongings so you can work methodically with your team.
Check each item for structural stability, surface contamination, and material sensitivity.
Hard, nonporous items like sealed metal or plastic often respond well to cleaning and drying.
Porous materials, such as paper, insulation, and unsealed wood, usually need faster action and closer review.
Remove items from standing water, elevate them, and label them for drying, cleaning, or disposal.
Bag small loose contents together to prevent mix-ups.
Keep a shared inventory so everyone on site knows what’s being saved, what needs treatment, and what’s already beyond practical recovery.
Damage Level Check
After separating affected belongings, inspect the damage level on each item so you can decide what’s worth salvaging and what needs disposal.
Check for warping, swelling, rust, staining, odor, and soft spots, then compare those signs to the material type. Hard, nonporous items often survive if you clean and disinfect them quickly.
Porous materials, like drywall-backed panels, insulation, and upholstered goods, usually won’t dry safely once saturated. Use gloves, a mask, and bright lighting so you can assess hidden moisture and contamination.
Test electronics only after a qualified technician clears them. Bag smaller items by category, label them, and keep a clear disposal pile so your work area stays organized and your team can move efficiently.
Document each decision with photos before you pack anything away.
Sentimental Item Priorities
When a burst pipe hits keepsakes, photos, heirlooms, and other irreplaceable items, sort them before you focus on less meaningful belongings so you don’t lose time on lower-priority salvage.
You should create three groups: salvage immediately, salvage after drying, and discard. Move wet items to a clean, dry area, then wear gloves and document each piece with photos.
Air-dry paper goods flat, separate photo layers with wax paper, and stand books upright with pages fanned open. For textiles, rinse mud-free fabric in cool water if needed, then hang it with airflow.
If an item shows mold, dye bleed, or structural collapse, isolate it for professional review. By prioritizing what matters most to your household, you protect shared history and keep your response organized.
Clean and Disinfect Surfaces
Once standing water’s removed, clean and disinfect every affected surface to limit contamination and prevent lingering damage.
You should start with hard, nonporous areas, using a detergent solution to lift residue, then apply an EPA-registered disinfectant at the label’s required dilution and dwell time.
Work methodically from the cleanest zone to the dirtiest so you don’t spread contaminants. Change cloths, mops, and gloves often, and rinse tools when they soil.
For porous items that can’t be fully sanitized, treat them only if the manufacturer allows it.
Ventilate the area to speed drying and reduce odors.
In a close-knit restoration crew, keep one person documenting what you’ve cleaned, what products you used, and what still needs attention.
Replace Damaged Drywall and Flooring
With surfaces cleaned and disinfected, inspect the drywall and flooring for swelling, soft spots, delamination, staining, or structural failure. Then remove any materials that can’t dry fully or safely. You’ll belong to the repair team when you replace only what’s compromised and leave sound framing intact.
Follow this sequence:
- Cut drywall back to clean edges, extending to the nearest stud.
- Remove warped baseboards, underlayment, and saturated subfloor sections.
- Measure, cut, and fit new drywall and flooring materials to match the opening.
- Fasten replacements securely, tape joints, and patch seams before finishing.
Keep replacement pieces dry during storage and installation. Use moisture readings to confirm adjacent materials are ready for closure.
Then install primer, paint, or finish flooring so the repair blends cleanly and performs as intended.
Know When to Call a Water Damage Pro
If the burst pipe has soaked insulation, reached multiple rooms, or left standing water behind walls or under flooring, you should call a water damage pro right away.
You can handle small surface spills, but hidden moisture needs professional extraction, thermal imaging, and meter readings to verify drying.
If you smell mildew, see warped framing, or notice bubbling paint, stop demolition and get help.
A pro will isolate affected areas, remove unsalvageable materials, sanitize contaminated surfaces, and document losses for your claim.
You’ll also avoid missing trapped water that can spread damage or weaken structural materials.
When you contact a restoration team, describe the leak source, affected rooms, and how long water sat.
That information helps them arrive prepared and keeps your home’s recovery moving quickly.
Prevent Future Pipe Bursts
To prevent future pipe bursts, you need to reduce freeze risk, pressure spikes, and corrosion before they damage the plumbing. You can protect your home by insulating exposed lines, sealing drafts, and keeping indoor temperatures steady.
Check supply pressure; if it runs high, install or service a pressure-reducing valve. Flush sediment, replace aging galvanized sections, and monitor for pitting or green staining so you catch corrosion early.
- Wrap pipes in unheated areas.
- Drain outdoor lines before hard freezes.
- Test pressure annually and after repairs.
- Inspect joints, valves, and fixtures for leaks.
When you stay proactive, you keep your system reliable and your household safer. These steps help your team prevent damage, reduce emergency calls, and maintain confidence in the plumbing.
Frequently Asked Questions
How Do I Document Burst Pipe Damage for Insurance Claims?
You’ll document it by photographing every damaged area, saving wet materials, listing affected items, noting dates, and keeping repair receipts. Then you’ll contact your insurer promptly, submit everything, and track claim communications carefully.
What Signs Show Hidden Mold After a Pipe Burst?
You’d love mystery odors, peeling paint, warped drywall, and recurring stains—they usually mean hidden mold after a pipe burst. Check damp cavities, insulation, and baseboards, then document growth, isolate areas, and call a certified inspector promptly.
How Long Does Water Damage Restoration Usually Take?
You’ll usually need 2-5 days for drying, then 1-2 weeks for repairs, depending on saturation, materials, and mold risk. You should document damage, extract water, dehumidify, and inspect moisture levels continuously.
Can I Stay in My Home During Cleanup and Repairs?
Sometimes you can, but you shouldn’t stay if moisture, mold, or electrical hazards linger. You’ll need technicians to isolate affected rooms, remove materials, dry structures, and verify safety before you reoccupy shared spaces.
What Should I Do With Wet Insulation After a Leak?
You should remove wet insulation immediately, bag it, and discard it if it’s saturated. You can dry lightly damp sections only if they’re uncontaminated. Then inspect cavities, sanitize framing, and replace insulation after moisture readings drop.
Wrap-Up
You’ve got two jobs at once: act fast and act carefully. Shut off the leak, cut power, and remove standing water before it spreads deeper. Then dry, clean, and inspect every surface so hidden moisture doesn’t turn into mold. Salvage what you can, replace what’s ruined, and call a pro if damage runs beyond your tools. Finally, insulate pipes and seal weak spots—because the cheapest repair is the one you never need to repeat.